Settings
Here you can find settings for each sequence.
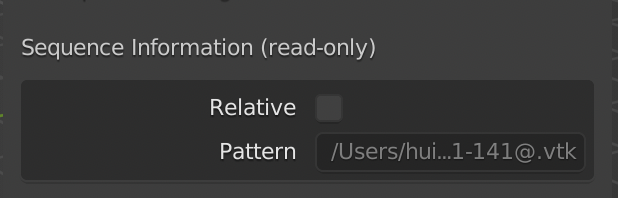
Sequence Information (read-only)
This is read-only information to show the pattern of this sequence, and if it’s using a relative path.
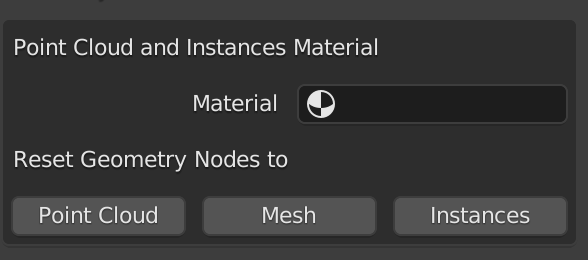
Geometry Nodes
While all files are imported as plain geometry, we provide some templates that we have found to be incredibly useful for visualizing particle data. The exact geometry node setup can be seen in the geometry nodes tab and may be modified as desired, e.g. to set the particle radius.
When applying the Point Cloud geometry node, the vertices of the mesh are converted to a Point Cloud, which can be rendered only by Cycles and only as spheres.
When applying the Instances geometry node, the vertices of the mesh are converted to cubes, which can be rendered by both Eevee and Cycles. You are free to change instanced object in Geometry Node Editor.
CAUTION: Because this node setup relies on the Realize Instances node, the memory usage increases extremely rapidly. Make sure to save the .blend file before attempting this, as Blender may run out of memory!!! Depending on your hardware and instanced object, it may be safe to use as many as 100k particles.
Applying the Mesh geometry node will restore the default geometry nodes, which simply displays the imported geometry as it is.
Notes:
Instancesis super memory hungry compared toPoint Cloud.After applying
Point CloudorInstancesgeometry nodes, you need to assign the material inside the geometry nodes, to be able to shade the object according to some imported field. So to save your work, you can simply assign the material here, then apply thePoint CloudorInstancesgeometry nodes.To access the attributes for shading, use the
Attributenode in the Shader Editor and simply specify the attribute string. The imported attributes can be seen in the spreadsheet browser of the Geometry Nodes tab and are also listed in the addon UI.
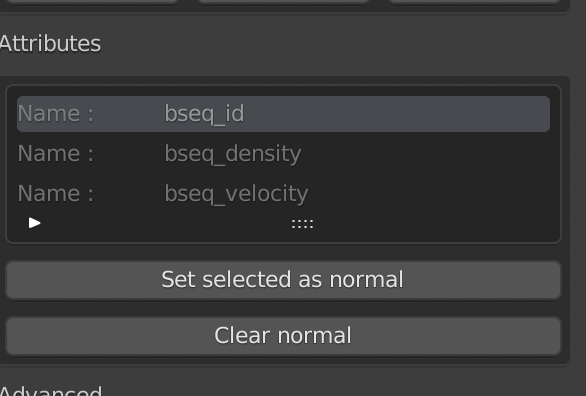
Attributes
This addon will also import attributes1 of the mesh object into the blender attribute system.
Here it shows all the vertex attributes detected and imported. To avoid name collisions with blender built-in attributes, all names are renamed using bseq_ as prefix. Names are read-only. For example, id -> bseq_id. Keep this in mind when accessing attributes in the shader editor.
The value of the attributes can be viewed in blenders spreadsheet which is part of the geometry nodes tab. There are many ways to use these attributes, such as attribute node when shading.
Split Norm per Vertex
We also provide the ability to use a per-vertex vector attribute as custom normals for shading. For more details check the official documentation here.
The button Set selected as normal will set current selected attribute as vertex normal2. The button Clear normal will reset the vertex normal to use the default face normals.